• Skip to primary navigation
  • Skip to main content
  • Skip to primary sidebar
  • Skip to footer

Patchwork Cactus

DIY, Design, Messy Hair, Food, Kids, Style, Parenting and Leopard Print

  • DIY
  • Life
  • Style
  • Food
  • Kids
  • About
  • Professional Organisation Service
  • Nav Social Menu

    • Bloglovin
    • Email
    • Facebook
    • Instagram
    • Pinterest
    • Twitter

DIY Felt Hair Bow Tutorial

June 12, 2018


DIY Felt Hair Bow Tutorial

You may have noticed that oversized hair bows are back, in a big way.

I love that my daughter wants to accessorise with giant colourful things, but spending $10 on a bow that lasts about a week is not my idea of a good time. I would much prefer to spend twice that on craft material and make my own. Jokes, kinda…

These paint splattered DIY felt hair bows are so easy to make, and they look super cute. And they only end up costing less than $3 per bow, provided you make a bunch. But you guys don’t craft to save money do you? I find that’s generally counterproductive.

Anyway, please enjoy this DIY felt hair bow tutorial. I have to say ‘DIY felt hair bow tutorial’ as much as possible so Google will find this post. So please don’t think I have lost my mind, I’m just playing the game.

DIY felt hair bow tutorial, DIY felt hair bow tutorial, DIY felt hair bow tutorial

DIY Felt Hair Bow Tutorial

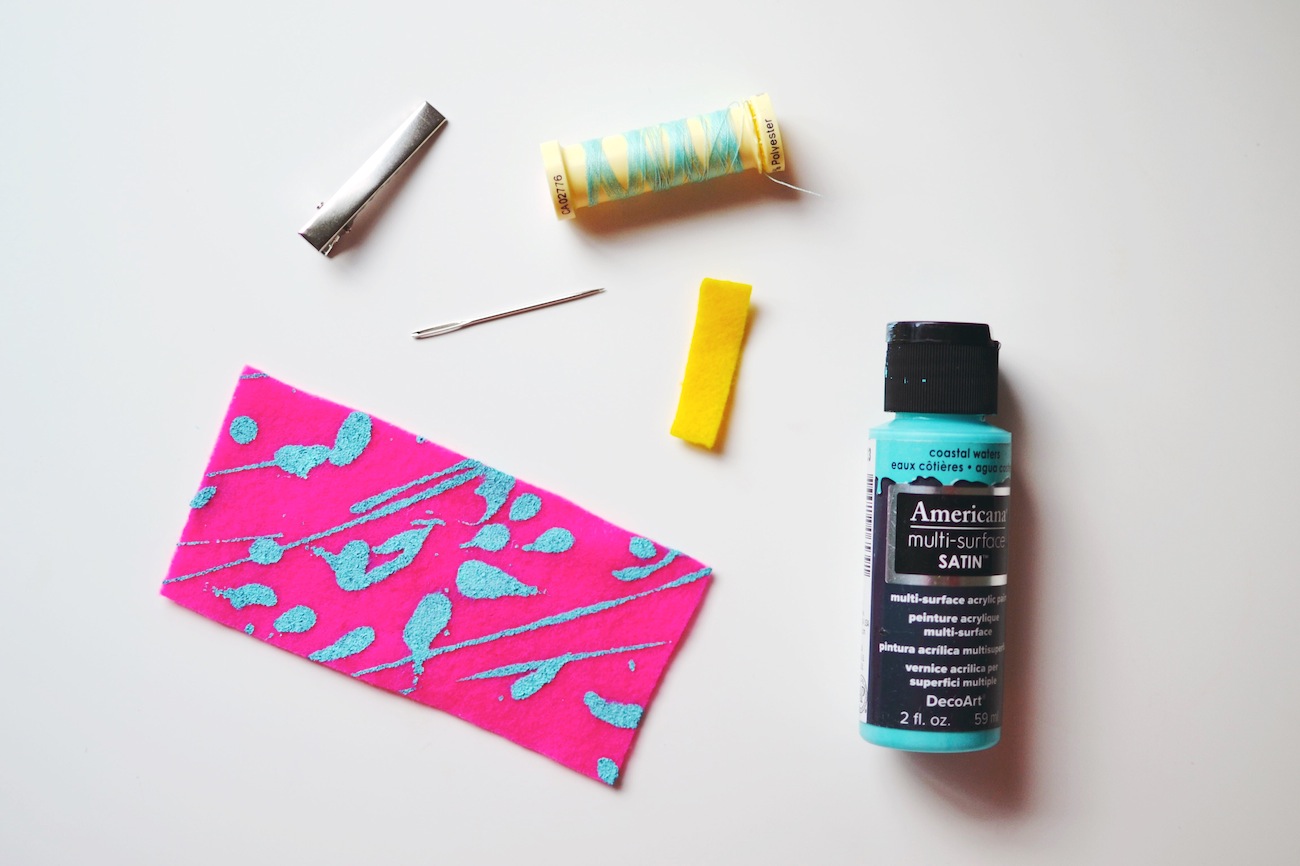
DIY Felt Hair Bow Materials

  • Felt (I used A4 sheets that I got from Kmart, like these ones)
  • Paint
  • Craft hair clips
  • A Needle
  • Thread, yes… I know, I’m running very low.

DIY Paint splattered Felt Hair Bow tutorial

DIY Felt Hair Bow Directions

  1. Lay out your felt (I used A4 sheets like these) on some paper and splatter paint all over it. I used the paint bottle at first but after that, I bought some small condiment bottles and used them for the squeezing/ splattering.
  2. After the paint is dry, cut out your big rectangle, whatever size you want your bow to be. Then cut out your small strip in whatever colour you want. I used yellow.
  3. Now squeeze your felt in the middle (like the picture above) so you get a bow shape and pop a stitch through it.
  4. Wrap your small felt strip around it, cross it over and the back and sew it to itself, not to the bow.
  5. Slide your clip into the strip and bam, that’s how you make a bow.

Check out my other craft projects here

And I made you a handy image to pin, it’s below.

xoxo Babs

These paint splattered DIY felt hair bows are super cute and perfect for a party favour.


Tweet
Pin
Share
Share

Filed Under: DIY

9 Happiness Hacks For People With Little People

Road Tripping With Ford #comeoutandplay

Don’t Forget To Evict Your Children This Week

Around Here – Homebodies

Around Here – On Country Time

working from home, you’re doing it wrong

Around Here – Coastside

10 ways to find more time in your day – for people with little people

Previous Post: «  The 6 Biggest Mistakes People Make When Moving Houses with Kids
Next Post: 10 things to do to fix a crappy mood »

Primary Sidebar

HELLO


Welcome to Patchwork Cactus Blog.
Life, style + a whole lot of good stuff.

Can I tempt you?

  • Advertise with me
  • Brand Storytelling
  • Family Photography
  • Freelance Content Creation and Consultancy

Want some Patchwork Cactus in your inbox?

Popular posts

Five items that will take your kids’ Summer wardrobe into the colder months

Two Ingredient Play Dough Recipe – a great alternative to DIY slime

It’s ok to tell your kids no, especially when it comes to pool time

Parenting mantras to help you create a calmer family culture - Waiting is the perfect time to breathe

Parenting mantras to help you create a calmer family culture

Three Alternatives to Hot Chocolate

Milo Balls Recipe - Cooking With Kids

Milo Bliss Balls Recipe

Instagram

Follow Me!

Footer

Instagram

Instagram has returned invalid data.

Copyright © 2023 · Patchwork Cactus